
I've had this happen to me often. For some reason or other the skimmer just decides to stop skimming. I think it knows when I think it's helpful and when it's getting in the way so when it knows that I'm finding it helpful it just quits to maintain it's annoyance.
Two things to try to kick the Skimmer in the pants:
1. Simply go to your project icon in the Browser and double-click it. This will reload the project (sometimes so fast you can't tell anything happened) and the skimmer will start working again.
2. You left Transform on. I have a habit of hitting Shift + T for the transform mode of a clip and forget to hit the Done button (or the blue Square icon button in the Inspector in the Transform section) to turn Transform off. While Transform is on, you don't seem to be able to Skim for some reason.
3. The third thing to try of the two things to try is to tap the "s" key in case you accidentally just toggled Skimming off while you try to reconcile some of the legacy Keyboard Commands with the new (and sometimes not only non-sensical but completely opposite) Key Commands.
Version 10.2.2
Showing posts with label timeline. Show all posts
Showing posts with label timeline. Show all posts
Thursday, November 12, 2015
Thursday, May 31, 2012
Fast Way to Find Multiple Uses of a Clip
If you've ever edited something with limited footage or too much footage you've probably gone back over it with a client and realized that you've used a shot more than once. Sometimes it's not obvious until you watch the edited piece, especially when you have limited footage and a precise script.
One trick I've used many times is to find the clip in question in the Bin and assign it a color label.
Highlight the clip
Hit Command + Option + any number key. I like using 6 for Green or 3 for Red.
You can toggle this while keeping an eye on the Timeline to see what gets labeled.
Sure there are other ways (like using Find) to locate what clips have been used but having a visual indicator of precisely where they are in the project helps me out tremendously since if they're far apart enough clients tend not to notice.
Tuesday, May 1, 2012
Name Sequences Appropriately Now To Save Time Later
I was watching the "head" of a group of editors a few days ago and while I waited for some photos to come in ("Can you do that moving pictures things like in documentaries?") I watched this person export a sequence, rename it, then compress it to the various formats the client needed then rename it again.
Then I watched him do it again.
And again.
And I realized what bugged me about it. I tend to name my sequences the final output file name right from the get go.
For example in my Bin, I'd have a sequence named along these lines:
An example would be
tyrellcorp-nexus07promo-newVO_V03
So when it's exported from the timeline it becomes:
tyrellcorp-nexus07promo-newVO_V03.mov
That way when I transcode it to something like H.264 or whatever (NO...NO WMVs! Not anymore!) it ends up in a handy name, with notations with version number and no spaces or weird characters that occasionally screw up FTP servers and email links and other various and sundry tend-to-go-wrong-unexpectedly-thingys.
I'll even mention what file type it is on the flashdrive/DVD/HD I hand them right in the file name sometimes:
tyrellcorp-nexus07promo-newVO-V03.h264.mov
tyrellcorp-nexus07promo-newVO-V03.animation.mov
Like that.
What the guy I was watching was doing was changing:
Tyrell Corp Nexus 07promotion with New VO
into something like
tyrellcorp-nexus07promo-newVO-V03.mov
by renaming it in the Finder each time.
My advice: name your sequences something that you won't have to edit later to send to the client or their FTP/cloud/server whatever.
Wednesday, April 4, 2012
Fixing Camera Bobbles
Let's say you have some footage that's supposed to be a lock-off but somewhere during the filming the camera gets nudged, or bumped or slowly drifts due to a loose lockdown or a sleepy operator.
If it's a short clip and you can't really use smoothcam or some other image stabilization software due to them digitally zooming in I'll do this:
1. Download and install the plugin "DH Grid" from here.
2. Layer that atop the less-than-smooth footage.
3. Resize and reposition the DH Grid overlay so it's grid aligns with a portion of the image that you want to stay where it is.
4. Set a Center keyframe in the Motion tab of the clip.
5. Now using the JKL keys, advance frame-by-frame (or small groups of frames) and Nudge the footage up, down, left and right as needed using the grid to keep it in place.
One great way to do this is to use the little known Nudge key commands in FCP: Option + Arrow Keys. It'll help if you have the Canvas set to Image + Wireframe and you must have the clip you're nudging highlighted in the Timeline.
If you want to nudge a really really tiny amount use Command + Option + Arrow Keys. Depending on how zoomed in you are -or aren't- in the Canvas you may need to zoom in to see these tiny adjustments.
6. Each time you nudge the clip on a particular frame you'll automatically set a keyframe.
7. Render and see how badly you messed up :) Don't worry, it's hard to get it right the first time. And the human eye/mind is so used to seeing movement that is natural, that unnatural movement will seem quite obvious.
Scoot back to the problem frames and adjust them as needed, render, wash, rinse and repeat.
Be aware though that if you've fixed a particularly nasty bobble, you're first inclination after making all these keyframes is to zoom the clip or reposition it (since the bottom or sides or top may be cut off).
DON'T.
If you move the clip now you'll set another Center keyframe and mess things up.
Instead, use this little-known key command: Hold Command + Shift and move the clip in the Canvas. Command + Shift will move the clip AND THE KEYFRAMES en masse without setting any new keyframes. Nifty, eh?
Thursday, January 19, 2012
Importing PDF files into Final Cut Pro
Today I was handed a 100+ page PDF to use in a FCP project. The problem is that FCP doesn't really like .PDF's all that much and if you drag a multi-page PDF into FCP you'll get a short clip that will essentially have each page as a frame. Not terribly useful unless that's what you'd like to see when you hit play.
Here are a few ways to get decent results without too much trouble using stuff you likely already have.
01. Open the PDF in Preview.
02. Hit Shift + Command + D to see the sidebar if it's not already open.
03. Hit Option + Command + 2 to see a long list of Thumbnails. Scroll down to the page you want to use in FCP.
Alternatively, if you know the page number of the page you want hit Option + Command + G to bring down the Go To Page text entry box, enter the page number and hit OK. The reason this may not be the best way is that some PDFs numbering schemes are off by a number or two, at least in the few that I've been given to use in FCP: ie.. Page 43 in the thumbnails is actually Page 42 as shown on the PDF.
04. Hit Command + Shift + S for Save As...
05. When the Save As sheet drops down select JPEG for the Format Pull-Down (you can also choose TIFF if you'd like to).
06. Set the Quality Slider to "Best"
07. For Resolution it will likely default to 150 pixels/inch. This should be okay for most situations, but you can bump it up higher if you'd like. I didn't notice too much of a difference between 150 and 300.
08. Tell it where you want to save the file and hit Save.
09. Import the file you just made into FCP.
10. Bring the .jpg or .tiff into the Timeline and Scale it if needed then render.
I've have acceptable results for corporate junk using this method. It's not the best quality but good enough for company work.
01. Open the PDF in Preview.
Here are a few ways to get decent results without too much trouble using stuff you likely already have.
METHOD #01
(Save As... in Preview, better for high-quality requirements like text)01. Open the PDF in Preview.
02. Hit Shift + Command + D to see the sidebar if it's not already open.
03. Hit Option + Command + 2 to see a long list of Thumbnails. Scroll down to the page you want to use in FCP.
Alternatively, if you know the page number of the page you want hit Option + Command + G to bring down the Go To Page text entry box, enter the page number and hit OK. The reason this may not be the best way is that some PDFs numbering schemes are off by a number or two, at least in the few that I've been given to use in FCP: ie.. Page 43 in the thumbnails is actually Page 42 as shown on the PDF.
04. Hit Command + Shift + S for Save As...
05. When the Save As sheet drops down select JPEG for the Format Pull-Down (you can also choose TIFF if you'd like to).
06. Set the Quality Slider to "Best"
07. For Resolution it will likely default to 150 pixels/inch. This should be okay for most situations, but you can bump it up higher if you'd like. I didn't notice too much of a difference between 150 and 300.
08. Tell it where you want to save the file and hit Save.
09. Import the file you just made into FCP.
10. Bring the .jpg or .tiff into the Timeline and Scale it if needed then render.
I've have acceptable results for corporate junk using this method. It's not the best quality but good enough for company work.
METHOD #02
(Dragging out a separate .PDF page)01. Open the PDF in Preview.
02. Hit Shift + Command + D to see the sidebar if it's not already open.
03. Hit Option + Command + 2 to see a long list of Thumbnails. Scroll down to the page you want to use in FCP.
04. Find the page you want and then drag the thumbnail in the sidebar to the Desktop or folder where you want it to go.
This will create a new PDF of just that single page.
05. Import the file you just made into FCP.
06. Bring the .pdf into the Timeline and Scale it if needed then render.
The results won't be perfect but good enough for some projects.
METHOD #03
(Making each page a separate image file. Read the Warning about this!)If you need each page in the PDF as a separate image file here's one quick and dirty way:
01. Open the PDF in Preview.
02. Hit Command + P for Print...
03. After the Print sheet drops down hit the PDF button at the bottom left.
04. Select either "Save PDF to Folder as JPEG" or Save PDF to Folder as TIFF"
WARNING!
Be aware though that when I do this there is no sheet asking where to save the files. For me, and maybe this is some kind of bizarre bug or me doing something wrong, it saved the individual pages as images files in my "-Tmp-" folder, which is inside an invisible folder (not meaning Lion's crazy invisible user folder madness).
Monday, September 26, 2011
Video Inspection Tools
If you get lots of strange formats and weird incompatibilities you've likely used a video inspector app before, maybe VideoSpec or Media Inspector.
A friend tipped me off to another one that's also FREE called iMediaHUD which is current and pretty spiffy. It even does folders of video clips.
I mention this because I had two clips allegedly from the same camera and one would become out of sync in the Timeline while the other wouldn't. Comparing the two with iMediaHUD showed some differences and I was able to sort it out.
It's free. Give it a whirl if you like to see some interesting specs on your video clips.
Friday, July 15, 2011
Rescuing Dark Footage
Sometimes you'll get footage that you absolutely have to use but it's far too dark as is.
One quick way to possibly rescue the footage is to double it up.
1. Place your dark footage on one track.
2. Color correct and brighten it as best you can (using some filter like Color Corrector 3 Way). Don't worry if it's not perfect, and don't forget to bump up the saturation if you bump up the mid levels a fair amount. The brighter something is the less saturated it tends to be.
3. Option-Click on the clip in the Timeline. (Option-Clicking will just select the Video portion of a clip with linked Audio) then while keeping Option held down, add Shift. Drag the video clip straight up to the track above it and let go of the mouse. You've duplicated the video portion of the clip atop itself.
4. Right-Click on the top video clip.
5. Select "Composite Mode" then "Add". If your clip now seems WAY too bright don't worry. Next step:
6. Bring the opacity down to about 50%. I like to hit Option+W in the Timeline for Toggle Clip Overlays then drag the line over the clip to around 50%. (If you want to get it exactly at 50% using this method hold down Command while you drag the Opacity Overlay Line down and you'll be able to adjust it in single digit increments, cool huh?)
7. Double-Click (or hit Enter with it highlighted) the top clip in the Timeline to load it into the Viewer. Goto the Color Corrector tab and start adjusting the Mids slider to the left (less bright) until the image in the Canvas is more to your liking.
None of this is set it in stone, so feel free to monkey with the method here all you want. It's the general idea of overlaying a clip atop itself, compositing it, lowering it's opacity and then adjusting it's levels that's important.
Around here, since so much of the footage we've received is incompetently underexposed, we've started to call this restoration method "bottom up pattern telegraphing" just to confuse the clients and not hurt their feelings too badly.
Friday, June 24, 2011
The Clip's Master Clip Is Not Present - Error
FCP has a long standing bug where when you have the playhead in the Timeline over a clip and hit SHIFT + F for Reveal Master Clip, you'll inexplicably see this:
 Restarting FCP will not help.
Reconnecting the clip will not help.
Trashing prefs hasn't helped me in this case.
Bizarrely, the clip will be fully visible in your Browser and/or Bin yet FCP will simply not be able to find it. It may be able to find other clips in the Timeline that reside in the same Bin as the errant clip, though.
I have no solution but it's an irritating, frustrating bug.
See, with the Timeline in the foreground and placing the playhead over a clip and tapping The F Key will perform a Matchframe where the frame -and Master Clip- that the playhead is over will appear in the Viewer.
But, hitting SHIFT + F with the Timeline in the foreground and placing the playhead over a clip and tapping F will perform a Reveal Master Clip; only sometimes it will just stop working. I have no idea why.
A workaround this to find a Master Clip and have it load into the Viewer is, like I mentioned, just place the playhead over the clip, make sure the Timeline is in the foreground (active) and tap the F key. You won't see the clip in the Bin or Browser but you'll be able to scrub around to see what else the clip holds footage-wise.
It's an incomplete workaround however especially if you need to see the following and preceding clips around the clip you're interested in. You'll likely find yourself doing this a lot while cutting a documentary and know that the footage is listed chronologically; a Reveal Master Clip would show you where the clip rests in accordance to the order the clips were shot in.
Another quirk is that if you do hit OK to "add a master clip to the browser" it'll do just that; and it'll find it if you load that into the Timeline (or Viewer, Reveal Master Clip works if the Viewer is the active window as well) and perform a Reveal Master Clip. Frustrating.
So there is a solution if you're willing to add a master clip to the browser (at root level) for every clip that suffers from this bug. But there's no guarantee that it won't randomly happen again. In fact, if you do add a master clip to the browser, place some of it in the Timeline, then for fun delete the newly created master clip from the Browser, FCP will toss up the Master Clip Not Present error.
Thursday, March 31, 2011
Fixing Offset Audio Levels
MANY, many people will offset audio levels while on set to avoid having the audio peak. For example they'll set channel 2 to be lower than channel 1.
This way when the audio does peak, it'll peak in channel 1 but not in 2 so you have clean audio. It's a great zero-cost way to have a little insurance that you have clean un-peaked audio. But it's a pain to clean up in post if you don't know about it before hand.
Tip #1: Listen to the footage with a decent pair of headphones.
An edit I'm working with now has the audio levels all over the place. My guess is that when they were shooting the cameraperson adjusted the audio levels on the camera when he or she remembered to; it's not consistent at all.
Here's my quick fix for it…after it's been dropped into a timeline. Ideally you'd only set one target audio track in the Timeline then center and boost from there but if your assistant didn't check the audio with headphones before hand…
In this case I only need channels 1 & 2.
1. Highlight the clip with the offset audio levels. In this case Ch1 is GOOD Ch2 is BAD.
2. Hit Option + L which is Toggle Stereo Pair. You'll see the "bow ties" on the clip vanish.
3. Hold down Option and click on the BAD channel, in this case Ch2. This lets you highlight just one of the stereo tracks.
4. With the BAD track as the only thing highlighted hit Control + B for Toggle Clip Enable. This will un-enable that channel. Disenable? Nonenable?
5. Hold down Option and click on the GOOD channel.
6. Now, hit Control + . (period). This will Pan Center the audio track.
7. If you need to boost it's level you can:
A: While it's still highlighted hit Control + + (plus) or - (minus) to bring it up or down 1 dB at a time, or use Control + ] (right bracket) or [ (left bracket) to bring it up in increments of I think, 3 dBs at a time.
B: While the clip is highlighted hit Option + Command + L to adjust Levels… (Unless you know the dB of the clip as is I suggest using "Absolute" here)
C: Head to Modify > Audio > Apply Normalization Gain (this does not have a key command by default, unfortunately) This will set the loudest portion of the audio to what you tell it here.
Be aware that if you try to set the audio tracks back as a stereo pair via Option + L after you make adjustments you'll undo most of the audio work you just did. I just leave them un-stereo-paired.
I prefer trying these in this order as usually option A works for me.
Wednesday, February 23, 2011
Play to Out Point...then stop.
You've selected an In (I) and Out (O) point for the current Timeline and want to see how the piece feels when it stops at your Out point. Easy, just place the playhead before the Out point and hit Shift + P for "Play to Out". It's kinda like clotheslining the playhead.
This will play from the current frame to the Out Point.
It's different than Shift + \ which is Play In to Out and only plays what is marked between (and including) the In and Out points of a timeline or clip.
I find Shift + P to be really helpful in judging when a clip should end especially if I'm breaking up long edits into smaller more digestible chunks.
Tuesday, February 1, 2011
Final Cut Pro's Batch Export
Batch Export has been a lifesaver for an ongoing documentary I've been cutting. The project will likely last a few years as things are continually documented.
One neat thing about the project is that weekly it seems I'm handed some pretty old footage that no one's seen in years if ever, however much of it is on old videotape. VHS, Hi-8, Umatic, Betamax, etc… I never know what's going to be in the boxes I'm handed.
I load in the tapes usually at night when it's quiet so I can hear any tape crinkling up or snapping (some of these tapes are OLD, folks) or tearing inside since some long-dead bug crawled into it, died and stuck the tape together on the spindle. That was fun.
I just wanted to mention Final Cut Pro's Batch Export feature which I use a lot when as I do some preliminary organization of all this footage. There are two basic ways to use it:
If you have several sequences with some stuff edited in them but only need to export portions of the timelines you can set In and Out points in the sequences and then in the Bin that contains the sequences, highlight the sequences and right-click and select Batch Export.
Batch Export (after you go through the various settings) will batch export only what's between the In and Out points of each sequence.
Things to keep in mind:
1. Make sure all your sequences in the Timeline are fully rendered.
2. In Batch Export's settings make sure to select "Use Item In/Out".
3. Make sure you've set Include Audio and Video and Make Movie Self-Contained according to your needs.
4. If you don't set In and Out points your entire sequence will be exported when you use Batch Export this way.
If you have more complexity when exporting things from FCP you can export subclips. It's not hard but there are a few gotchas to be aware of.
Basically, in the Timeline or Viewer set your In and Out points as usual and hit Command + U to make subclips. Name them something helpful to you.
Optional Step:
Once you have all the subclips you need to export, highlight them, then head to Modify > Remove Subclip Limits in the Menubar. This turns them into Master Clips and is a handy way to have more "handles" on subclips if the original subclip wasn't long enough or you want to tweak the In and Out points before Batch Exporting. It's not necessary for batch exporting them, however.
Select the bin containing them and right-click and select Batch Export.
Batch Export will export each subclip as a separate clip.
But what if you have a bunch of Markers set in a long video clip that you want to Batch Export? No Problem, it's in another post here.
Things to keep in mind:
1. Try and keep your subclips organized in one bin.
2. If you have your subclips in some order in your Timeline and want to retain that, drag them from there into a separate bin just to keep things organized and this allows you to highlight them all and export them separately simultaneously.
3. Select "Use Item In/Out".
4. Set Include Audio and Video and Make Movie Self-Contained according to your needs.
One neat thing about the project is that weekly it seems I'm handed some pretty old footage that no one's seen in years if ever, however much of it is on old videotape. VHS, Hi-8, Umatic, Betamax, etc… I never know what's going to be in the boxes I'm handed.
I load in the tapes usually at night when it's quiet so I can hear any tape crinkling up or snapping (some of these tapes are OLD, folks) or tearing inside since some long-dead bug crawled into it, died and stuck the tape together on the spindle. That was fun.
I just wanted to mention Final Cut Pro's Batch Export feature which I use a lot when as I do some preliminary organization of all this footage. There are two basic ways to use it:
Batch Exporting Sequences or Portions of Sequences
If you have several sequences with some stuff edited in them but only need to export portions of the timelines you can set In and Out points in the sequences and then in the Bin that contains the sequences, highlight the sequences and right-click and select Batch Export.
Batch Export (after you go through the various settings) will batch export only what's between the In and Out points of each sequence.
Things to keep in mind:
1. Make sure all your sequences in the Timeline are fully rendered.
2. In Batch Export's settings make sure to select "Use Item In/Out".
3. Make sure you've set Include Audio and Video and Make Movie Self-Contained according to your needs.
4. If you don't set In and Out points your entire sequence will be exported when you use Batch Export this way.
Batch Exporting Subclips
If you have more complexity when exporting things from FCP you can export subclips. It's not hard but there are a few gotchas to be aware of.
Basically, in the Timeline or Viewer set your In and Out points as usual and hit Command + U to make subclips. Name them something helpful to you.
Optional Step:
Once you have all the subclips you need to export, highlight them, then head to Modify > Remove Subclip Limits in the Menubar. This turns them into Master Clips and is a handy way to have more "handles" on subclips if the original subclip wasn't long enough or you want to tweak the In and Out points before Batch Exporting. It's not necessary for batch exporting them, however.
Select the bin containing them and right-click and select Batch Export.
Batch Export will export each subclip as a separate clip.
But what if you have a bunch of Markers set in a long video clip that you want to Batch Export? No Problem, it's in another post here.
Things to keep in mind:
1. Try and keep your subclips organized in one bin.
2. If you have your subclips in some order in your Timeline and want to retain that, drag them from there into a separate bin just to keep things organized and this allows you to highlight them all and export them separately simultaneously.
3. Select "Use Item In/Out".
4. Set Include Audio and Video and Make Movie Self-Contained according to your needs.
Friday, July 9, 2010
Setting Nothing as a Target Track
Here's something that's handier than you'd think.
When you're doing an assembly (say for a feature) and you want the image but not the audio or vice-versa rather than reach for the mouse to unselect a target track (ie...set it to nothing) try this:
For no video target track hit F6 + 0 (zero) or hit SHIFT + F6. Either way works.
For no audio 1 target track hit F7 + 0 (zero) or hit SHIFT + F7. Again, either way works.
For no audio 2 target track hit F8 + 0 (zero) or hit SHIFT + F8. Both function identically.
I find Shift + the f-key to be more convenient for me but see which works best for you. Some people like to keep track of track numbers in their head and Track 0 (zero) is "no target" in their way of thinking which is a great way of thinking about it.
The upshot of this is that since there are two commands that have the same function you can remap Shift+ the F-key to something else if you want.
Friday, March 5, 2010
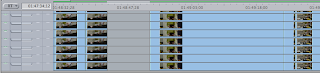
Strange Approximation Symbol in the Timeline
This screenshot was sent to me via email a little while ago:

The emailer is trying to find out what it is and what it means. I don't recall seeing this before in the Timeline. It looks like a formal Approximation symbol ≈ (option+x) to the left of the thumbnail and has actually moved the thumbnail to the right. Has anyone seen this before or know the cause?
UPDATE: Solved! It's a "mixed-sync indicator" and explained (with screenshots) in the FCP manual:
Thanks to everyone who offered help in the comments!

The emailer is trying to find out what it is and what it means. I don't recall seeing this before in the Timeline. It looks like a formal Approximation symbol ≈ (option+x) to the left of the thumbnail and has actually moved the thumbnail to the right. Has anyone seen this before or know the cause?
UPDATE: Solved! It's a "mixed-sync indicator" and explained (with screenshots) in the FCP manual:
Moving a single pair of items out of sync results in a single out-of-sync duration, with out-of-sync indicators with positive and negative durations in both the video and audio items.
If you then move a second pair of audio items out of sync by a different amount, each audio item that is out of sync from the anchor item has an out-of-sync indicator noting its individual offset from the anchor item—in this example, the video item. The anchor item displays a mixed-sync indicator with no duration. This tells you that multiple linked items are out of sync by varying amounts.
Thanks to everyone who offered help in the comments!
Tuesday, January 26, 2010
Rendering a keyframed cropping results in missing image
This bit me tonight and I have no idea what caused it.
I have four elements, Text, Text, Image, Image all on separate layers. The two text elements are keyframed to move a bit and the first image is keyframed to move in sync with the text. The other image is keyframed independently. It's all very basic.
The mini-sequence has a green Preview render bar over it and plays as expected but when it's fully rendered the first image, the one keyframed to the text's movement VANISHES. And I'm not alone; I found a post about it here from Feb. 6th 2009:
What's interesting is his keyframing seems very similar to what I was doing with this image. At first I thought I goofed and had the "reveal" keyframes going in the wrong -opposite direction- but they weren't.
What didn't work was re-launching FCP, deleting render files, toggling track visibility or rebooting the Mac. What DID work was right-clicking on the image file in the timeline, selecting Remove Attributes...and ticking Crop and then hitting Okay to remove all cropping of the image.
I then re-did the keyframe cropping, rendered and it was fine.
I have four elements, Text, Text, Image, Image all on separate layers. The two text elements are keyframed to move a bit and the first image is keyframed to move in sync with the text. The other image is keyframed independently. It's all very basic.
The mini-sequence has a green Preview render bar over it and plays as expected but when it's fully rendered the first image, the one keyframed to the text's movement VANISHES. And I'm not alone; I found a post about it here from Feb. 6th 2009:
Help!!! Let's see if I can explain this....I have taken a clip and placed it on the timeline. I applied some croping elements to it and motion...it starts our as a very thin line and then moves up and down to create a rectangle. I can view it on the timeline but the minute I render it with "full" and then view it, it no longer exists....When I export it to make a Quicktime it is gone....
What's interesting is his keyframing seems very similar to what I was doing with this image. At first I thought I goofed and had the "reveal" keyframes going in the wrong -opposite direction- but they weren't.
What didn't work was re-launching FCP, deleting render files, toggling track visibility or rebooting the Mac. What DID work was right-clicking on the image file in the timeline, selecting Remove Attributes...and ticking Crop and then hitting Okay to remove all cropping of the image.
I then re-did the keyframe cropping, rendered and it was fine.
Friday, December 4, 2009
Quickly Move Through Multiple Clip's Filters Via Keyboard

Let's say you need to make some differing adjustments to a series of color correction 3-way filters for some clips in sequence in the timeline. Rather than sit there and double-click through each one try this:
01) Double-click a clip to load it into the Viewer. (Alternately, highlight it and tap Enter)
02) Then (with the Viewer window having focus) use "Go to Next Edit" on the keyboard. It's Shift + E or Control + 8 or (Apostrophe).
03) As you move to each Next Edit per keystroke, the Viewer's Filter's tab will update to represent each clip the playhead is at the beginning of in the Timeline. The Viewer will act as though you have Open or Gang enabled in the Playhead Sync menu.
You can also use Up and Down arrow while the Viewer is highlighted.
So you can make quick adjustments to the filters as you cycle to each clip (per edit point so not each key press will go directly to a clip, but rather an edit point). The other thing to be aware of is if you have a cross-dissolve or something, while you progress through edit points the Canvas will just show the middle of the cross-dissolve and then move to the next edit point so mentally, you may miss a clip.
Bonus Tip: Since there are three keyboard commands for the Go to Next Edit command two of these are ready to be reassigned to something else if need be.
Tuesday, November 10, 2009
Add Audio Edit ... only
Here's a potentially time-saving tip that maybe isn't all that obvious.
If you're mostly editing audio (taking out the Director's long loud direction, timing beeps, etc...) but don't want to adjust or edit the video and you're in the habit of using Control + V like I am to edit all you need to do is turn off Auto Select for the Video tracks and Control + V away to just edit the audio tracks.
If you're mostly editing audio (taking out the Director's long loud direction, timing beeps, etc...) but don't want to adjust or edit the video and you're in the habit of using Control + V like I am to edit all you need to do is turn off Auto Select for the Video tracks and Control + V away to just edit the audio tracks.
Saturday, September 12, 2009
More FCP Timeline Graphical Glitches
FCP has a handful of graphical glitches like leftover playhead lines etc...but here's a fun one:
Apparently (the email was a little difficult to follow) it was caused by making a series of visual adjustments to the timeline like changing the height of the audio tracks via the Option key and then dragging down the split until the Video track section didn't have a scroll box...and then scrolling the video track section with the mouse's scroll wheel.

Apparently (the email was a little difficult to follow) it was caused by making a series of visual adjustments to the timeline like changing the height of the audio tracks via the Option key and then dragging down the split until the Video track section didn't have a scroll box...and then scrolling the video track section with the mouse's scroll wheel.
Saturday, May 30, 2009
Scrolling Playback in the Timeline
FCP doesn't really like to scroll the timeline while you playback footage. And while I wish there was an OPTION for it, I'm okay with it not scrolling at all. It really does save some CPU when you're doing HD muiltclip editing and other CPU intensive tasks as well as increase your bandwidth usage as FCP pulls thumbnails from the footage on the drives to display in the Timeline. We'd probably see a lot more dropped frames if the Timeline scrolled all the time. At least in FCS2 on Leopard.
However, if you have a Mighty Mouse you can scroll with it's trackball while you're playing footage in the Timeline but this will eat up some CPU cycles as well as use a little more bandwidth from your hard drives. But, if a client insists that they see where the playback bar is while you're editing and playing edits, keep your fingers near the Shift and PageDown keys. Shift + PageDown will advance the timeline one "screen" at a time during playback.
However, if you have a Mighty Mouse you can scroll with it's trackball while you're playing footage in the Timeline but this will eat up some CPU cycles as well as use a little more bandwidth from your hard drives. But, if a client insists that they see where the playback bar is while you're editing and playing edits, keep your fingers near the Shift and PageDown keys. Shift + PageDown will advance the timeline one "screen" at a time during playback.
Saturday, April 4, 2009
.motn files render as black in FCP timeline
I've mentioned this a long time ago here, and this ridiculous bug still persists.
Basically, when you go from Final Cut Pro (6.0.5) to Motion (3.0.2) and then back again (via saving in Motion) sometimes the .motn file that is initially placed in the timeline will be completely black. Also, sometimes, when you open it in the Viewer, it's fine; putting it manually into the timeline it looks fine but unrendered. Render it and it's all black again.
Bizzarely, create a new sequence and place the .motn file into the timeline and it'll look fine, render it, and it'll be black.
Worst of all, export from Motion and the resultant Quicktime file will sometimes be all black.
There's another thread on this here.
Stranger still, in Motion, Export Selection... will do nothing when In and Out points have been set.
This must be some kind of rare bug (possibly confused alpha channels or frame rate mis-match) or settings issue with Motion or Final Cut that spans software versions, years (yes, years) and Mac models and graphics cards. I'm experiencing this issue on not only with a newer version of FCP than last time, but Motion as well, as well as a model of Mac that wasn't available at that time with a graphics card unavailable at that time.
The solution? For me at least, there is no solution, only a workaround of exporting out of Motion as an 8-bit Uncompressed file then import that into Final Cut Pro.
If you have any information, tips, hints or anything about this please let me know. I'm not the only one dealing with this issue judging from a few people I've asked about it.
Here are some links to threads about this issue (and similar ones) from some emails I've received:
FCP interprets .ipr & .motn files (correctly) with Black alpha. Since when?
Livetype problems since going to FCP 6.0.3 and QT 7.4.5
Livetype problems with K3
Live Type maybe fixed?
Livetype Effects misbehavin'
Suggested Possible Solutions:
01. Change the Alpha of the Motion files from straight to black (or vice-versa).
02. Go to the View menu and change the preset for playback to none or at least something other than what it is set to now.
Tuesday, March 31, 2009
Looping Video Playback in the Timeline
Someone emailed me the other day asking how to loop video playback in FCP's timeline. After thinking about it for a little bit (and way over-thinking how to do it) it hit me and it's simple.
Set your In and Out points in the timeline. Don't bother with Option + A to select the portion of your sequence within the In and Out points. Tap Control + L to turn on Loop Playback, then hit Shift + \ (backslash) to just play the portion of the sequence between the In and Out points.
(Thanks to Josh for bringing this up!)
Subscribe to:
Posts (Atom)

